Saturday, August 18, 2012

The Tiny Lady

One of my noblemen's daughter will be here to join us for Kansas City Faire this year, so I thought that a good princess dress would be a nice thing for her to have. So I started looking for a children's pattern that could easily be made into a good dress for Faire, and found something that I had confidence in.


The dress is shown with lots of Tulle and a horrible shiny costume fabric. But I saw the potential! I took the pattern, tweaked it a bit and made it into two pieces; an overdress and an underdress. The result was beautiful!


The blue is actually made of a light carpet, I figured a three year old wouldn't understand the concept of keeping a dress clean so I wanted something I could clean easily after she wears it. The underdress is a gold brocade with gold flowers. Each peice is trimmed with black satin, and the overdress is further decorated with tiny pearl trimming. It is hard to believe that a three foot tall child could take twelve feet of pearling to decorate a dress. To top it off, we bought a few jeweled pendants to sew to the dress and add a little more color. And, viola! It is not the fanciest of things, but a three year old will only see pretty colors and it is rare that you see children in garb anyway!

A Faire List

Well, Kansas City Faire is in September, and look at the date! I have less than three weeks before our scheduled Faire date, and I'm scrambling to get it all done! So let's look at what I have to do so far...

First, the two men in my life will need shirts to go under their beautiful garb (which they haven't even gone fabric shopping for yet!), this should be a relatively short project, just one with pleating and painful hand-stitched detailing. Which may wait until after Faire when I have more time...The detailing I mean.


Now, on to the more difficult things that need to be done!

One of my noblemen this year is portraying Alfonso d'Este (to accompany me as Anna Sforza), and her garb will prove to present a challenge. Here is the portrait of Alfonso that this noblemen has chosen to model after...


Instead of this portrait...


Needless to say, I was slightly annoyed that Alfonso had to have the big garb, and couldn't settle for the small garb!

So, from what I can tell, looking at the big garb, it is an english styled overcoat with fur lining, ot top of an italian styled men's gown. The english pattern does show this coat with a gown but not the right gown. The english style was a front closing gown that had a large open chest so that the wearer could show off a doublet under the gown. Just more peacocking (which is what this garb has been nicknamed!)
So we have two patterns for this...

We will be using view IV of both patterns, the coat from pattern 55 and the plain gown from pattern 43. Not to mention the jewelry I have to hunt down pieces for and make for Alfonso to really look the part. The pendant will be especially difficult, I know that it won't be an easy one to find.

Another nobleman of mine is fascinated with the costuming from The Tudors, so he wants a simple dublet and slops, thank goodness. Unfortunately those patterns had to be ordered off of ebay...


This choice makes my sewing tasks much easier, as I have confidence in my ability to put this set together. Again, we are just waiting on the good sir to purchase fabric! I don't think we will be worrying about caps for either of these good men so that narrows my list down in an amazingly easy way.

Another set to be made is for an older lady who is accompanying us to Faire this year. She didn't want to be worrying about a corset or anything like that, so we chose a good pattern that wouldn't require any sort of renaissance under-thing.


We will be making the light blue version with the big angel sleeves, looks easy enough, I suppose I will find out! Again, fabric has not been purchased yet. *Sigh*

Then, we have another piece of my dream closet. Not something I envision getting done before Faire, but certainly high on my to-do list... A period dressing gown. You see them in The Other Boleyn Girl, but an actual pattern for that doesn't exist, so I found this!


I think that this pattern will work if I bring in the sides and add fabric to the pleating in the back...


Other than that, low on my priority list but something I would like to have finished before Faire, is garb for the little boys!


I know that dressing a boy as a knight like this is not period at all, but for the sake of the kids, and the sake of my patience, I have abandoned that idea. There is also a girl to have garb as well, but hers is done and so I will include that in another post.

Lastly, the gold sleeves of my italian still need to be finished to top me off, and as it gets closer I may look into a cape. Wish me luck, eh?


The Dress

So, this is a dress from The Other Boleyn Girl, it was only shown in brief moments, but I am so incredibly in love with it! So, after I finish all of my other projects for Faire this year, I plan on starting the intense fabric hunt to find what I need for this fabric.

It looks like a soft burgundy velvet, possibly satin for a substitute but I love this velvet. Typically velvet is not a good choice, if it is crushed velvet it isn't period but true velvet is too stiff. This velvet looks like a true velvet that doesn't have that stiff back. The front panel looks like a satin, not a brocade but it could be substituted... Plus the beautiful gold satin sleeves! Luckily, the pattern for this has already been purchased. Twice, actually.

I'm not sure if I want to use the Simplicity pattern or the Period Patterns pattern. I find that the Period Patterns come with very vague instructions and too much 'refer to...' type setup, but they are the more accurate period patterns and the lack of real shape in the pattern makes it easy to alter (with a few muslin mock-ups). Alternatively, the Simplicity pattern is easier to use, fairly easy to alter for the right fit and has directions that are miles better than the vague instruction pamphlets that come with the first. I suppose I could make mock-ups from muslin of both patterns, see which fits better in full garb, but I do hate to buy fabric that will simply be thrown away. The other downside to Period Patterns is the way that patterns are printed, with multiple styles on the same pattern piece. Basically, this issue is worst in the bodices; when you cut into one bodice for one style you are cutting another bodice apart. So that leaves you with two choices; buy the pattern because you like it for one specific dress, or trace each piece on butcher paper so that the original pattern isn't being cut. We shall see, that project is a long time in coming, so it will be a bit before you see another post on this dress.


Wednesday, August 15, 2012

Couching. Beading. Sore Fingers!


 <--- It takes SERIOUS patience to lace yourself into a back lacing gown like this, just saying.

Okay, so this post is for a work in progress, which has been a work in progress for a LONG time. My first dress was a green and brown venetian, with big pretty open sleeves. Well, I spent a long time swearing that I liked my dresses plain and I didn't want anything too ornate or ridiculously over decorated. So I left it plain for a long time and it was worn once and then tossed in a tub of garb and forgotten.

But! I found the dress and decided that, somehow, I was going to decorate it. So I started googling my little heart out and I stumbled across an article about Couching.

Couching is a technique where you take some kind of cord, or even thick thread, and you sew it down with embroidery floss in whatever design you like. Well, I didn't find any photos of this technique for garb but I did find some really neat examples;


So, armed with these images, I set to work trying to come up with a way to decorate this horrifically large dress...

First was the task of getting supplies together...

I didn't know that walmart sold embroidery floss before this project, by the way. I was very pleased. I also am convinced I beat walmart with this trip, my total purchase cost was less than the number of items I bought!

I figured that I would do the basic trimming of the bodice...


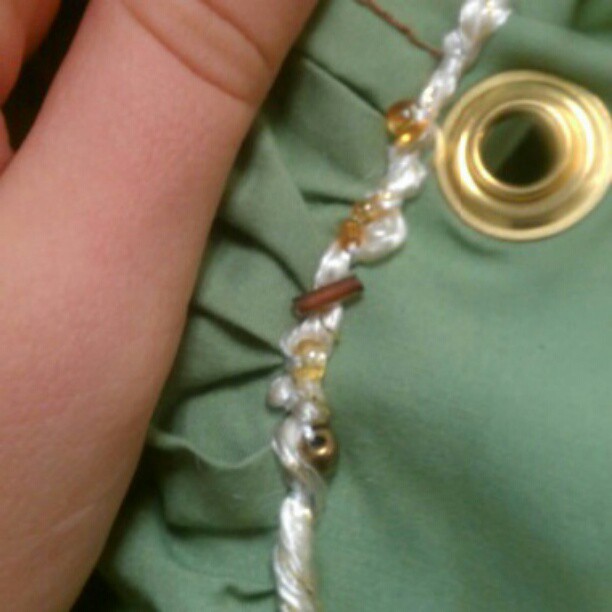
I couched the trimming onto the bodice then took an assortment of sead beads and sewed it down over the trim. It turned out very pretty but took far more time than I expected. The trimming alone on this part took me two nights of work and movies to get done.

After that, I realized that to make this dress proper, I needed to close the sleeves. So, I had to run back to walmart and get the little things I needed for that task... Which turned out beautifully!


I also might have sewn through my finger in the process of that. But, well worth the effort.

Then, at a loss for how else to decorate, I decided to couch the sleeves just as I had done to the trim. This step has never been completed, the dress is sitting in my project crate...


That is one sleeve done, the other is half done and that will be a complete dress for me...I just don't want to spend the last six hours it will take the finish the darned sleeve!


Tuesday, August 14, 2012

An Italian?


So recently I have been doing some research on the italian dress of the time, of course it is easy to find venetian gowns that are reminiscant of Romeo and Juliet and The Princess Bride, but I didn't go through all the work of that corset to just lay it off to the side and not wear it! So I stumbled across these pictures and fell in love! Although I don't think that the corset is necessary in this style of gown, it certainly makes me feel better to have the flat, rounded barrel chest that I admire so much in portraits of the day! The portrait on the left, the orange dress with the black ribbon laid the frame work for the dress that I wanted to make. I like the colors but being the skin tone I am I realized that orange was not the right option and I needed to switch the orange dress and blue sleeves to be the opposite (great choice, now that I look back in hindsight). So, being unable to wrap my head around pattern making, I found a pattern from renstore.com that had the perfect style of dress in it.

I used Period Pattern Number 41;
View IV, bottom far right. The trick with this pattern that I wasn't a fan of is that all the different bodices are drawn onto one bodice pattern and you cut that pattern based on the gown you're making. So, to reuse and make all 8 views you should invest in a role of butcher paper and not cut a single piece of the pattern itself. For my purposes though, being a fan of the one and not the others, it worked just fine. The only thing I would have been upset with having to trace out is different styles in the sleeves, but those came seperately drawn, so crisis averted!

The pattern is easy and pretty general, so I started making muslin mockups...Which meant I laced myself into my corset for a few hours and began cutting and sewing the same pattern with different tweaks, over and over and over, until I got the perfect fit! After fitting my muslin, I started the bodice...


I used that same sandwich method to sew my lining into the corset, I used six layers of black duckcloth canvas to keep the satin from moving or wrinking and such. A great choice for strength without thickness but my machine wasn't too happy with me. I treated it with oil and a good dusting afterwards, I was afraid it would quit on me halfway through!

After the bodice, everything else was easy. Panels and panels of blue fabric, pleated to the bottom of the corset was easy athough time consuming. 
Simple bias tape (store bought because I'm a cheater) lined the edging of the bodice, and eyelets to close the bodice. Here I did run into an issue; perhaps it was my novice lacing partner's lack of garb knowledge but the middle would slide open as soon as he tied the top...I fully believe that being laced by someone else will solve this issue. But some creative lacing was the solution we needed! Instead of lacing the bodice with one long string of ribbon, we tie each set of eyelets closed with a short piece of ribbon and let the long pretty bow hang down the back of my bodice. Problem solved, crisis averted.

All that was left on the blue dress was the ribbon on the skirt, which, in hindsight would have been better if I had sewn in on before putting the skirt panels together and attaching them to the bodice, but we all make little mistakes right?
Pairing the dress with a simple partlet made it perfect! Modest and perfectly period!
Eventually, sleeves will be created, I have gold fabric with pretty flowers just waiting...Pinned and all, laying to the side on my sewing desk waiting for me to stop getting distracted and cut and sew a few simple lines! I plan on attaching small hooks to the top of the bodice arms, at the edge and on the inside seam of the sleeves so that I can attach them just at the top and have the shirt sleeves peeking out from under the arms just as the portraits above. Will update when I get there!


"How hard can sewing a corset really be?"

Well, in this I feel like I got lucky. The process definately had the usual ups and downs, the lulls and the rushes but not in the ways that I usually see with other projects.

When I realized that I wanted to sew my own corset (due to the inability to find a good renaissance corset without paying an arm and a leg for it) I began the search through pattern reviews, boning expenses and wading through the endless educational links that a google search of 'Renaissance Corset' pulls up for you. I stumbled upon a review for an 'Alteryears Easy Renaissance Corset' and I thought my dreams had come true! What the review didn't say was that I would wait 3 months for the corset and that this particular company had no real customer service and took weeks to even send a quick email back, not to mention the three unreturned voicemails...*grumbles* BUT! I finally recieved my easy renaissance corset kit and got right to work. The kit came with the right steel boning, coutil fabric and the pattern; the overthinker in me swore it couldn't have been that simple, but it is.

So, I cut and pinned my pattern...


And got to work sewing.


The pattern calls for the 'sandwich' method; basically you cut your two pieces of fabric and sew them together, leaving the entire middle of pattern area open for your casing (I'll show that too). It is really easy, probably my favorite method so far, I use it for everything I can!

The next part was where the actual work comes into this type of method; you have to actually measure out each casing and place them very carefully before sewing the fabric for your steel (or whatever you prefer) boning is inserted.


I took a marker and a steel ruler and, using the casing guides provided (with my own tweaks of course) actually marked where each stay would go so that I had each and every line laid out before I started sewing. I think that this made it a bit easier to eliminate any issues regarding spacing, any flaw in the straight line sewing of the tabs, etc. Then to sew the casings!


Again, I think marking ALL the casing guides before sewing a stitch was really the best way for me.

Next, is simple insertion of the boning!


I don't have a photo of this next step, but I used store bought bias tape to bind the top edge of the corset, the way this pattern is designed it leaves a gap of about a half inch for you to sew your binding onto the corset without the boning interfereing. That was probably the easiest step of the entire project (although I did stress this step before I realized the little gap trick the pattern creator pulled!)

Then to add eyelets.


Typically you will hear people talk about grommets, but grommets are really difficult to work with and, more often than not, they actually use eyelets. I have a $30 eyelet punch/setter from Joannes that works really well for this type of thing. I did not have the eyelet punch/setter at the time of this corset (-___-) so I had to cut each individual hole myself and set each eyelet with the old fashioned hammer and tool. My eyelet punch/setter is my favorite, needless to say.

So that is a (basically) finished corset!


Now, I love to know that my work is period and proper, but that is an issue when it comes to things like this. Eyelets and grommets were not used or created until the 18th century (they were invented by a doctor in the French Army for surgical purposes), any holes in a garment meant for lacing would be reinforced by threading around the button/eyelet hole. So, I covered my cheating eyelets with thread!


Personally, I like the covered eyelets. The cloth embroidery thread also makes it easier to lace into the corset, it seems like it gives the cord something to sortof grab to when you're working on getting it completely fitted and snug!

All in all, I liked the end result, the pattern itself didn't need any tweaking but I wouldn't suggest buying this particular kit from Alteryears. I can't abide the long wait with no explanation and the lack of customer interaction. Especially from a small business. The experience is my favorite part, so it was really unacceptable to me. It only took me a total of 7 1/2 hours to sew the corset (not all at once, mind you!) so I would say the description fit the product.

I would not reccomend this pattern for bustier women, it works really well for a petite figure like mine that needs to the corset more for little adjustments than for shaping the body. I do think that it is a good 'learn-to' corset though!

*Soon I will be attempting a corded corset, possibly using an altered version of this pattern. From what I have seen it was a popular method in the italian renaissance and I think it could provide much better support and shaping!